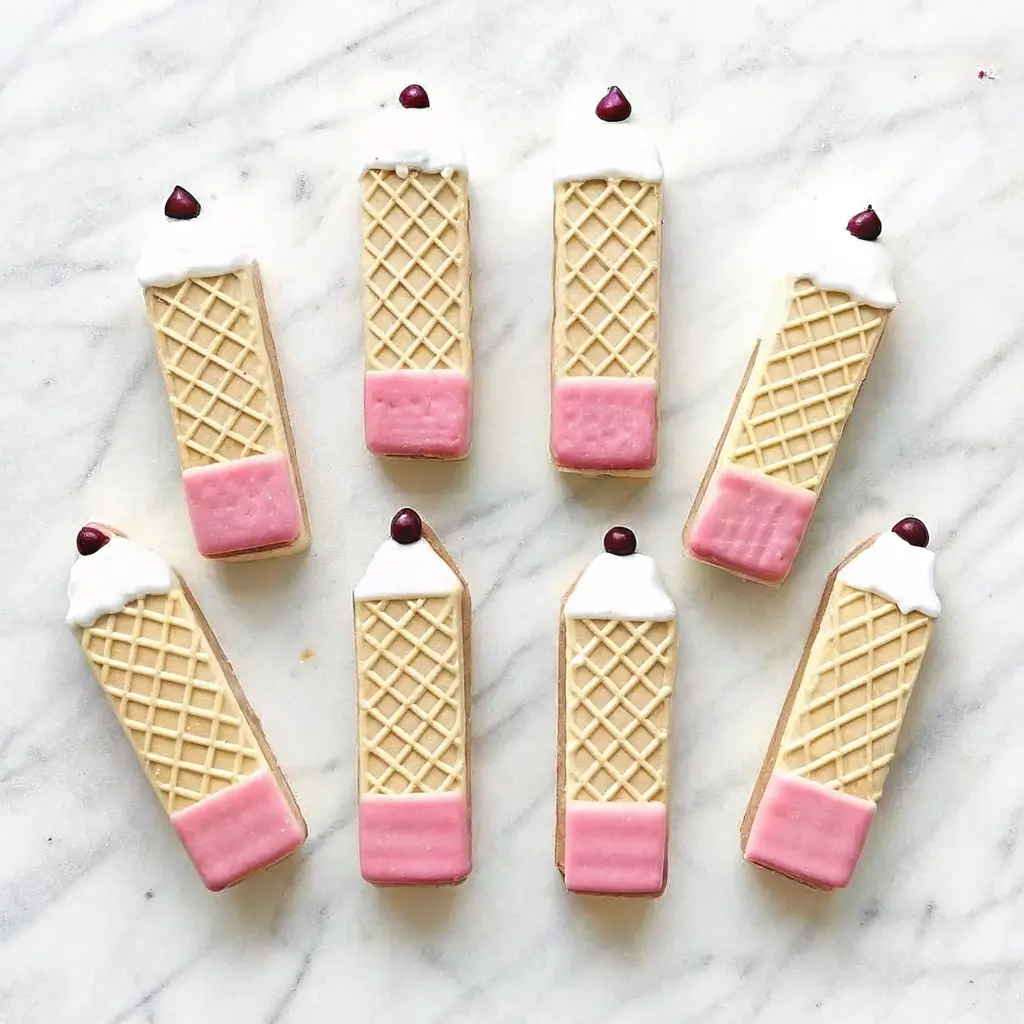
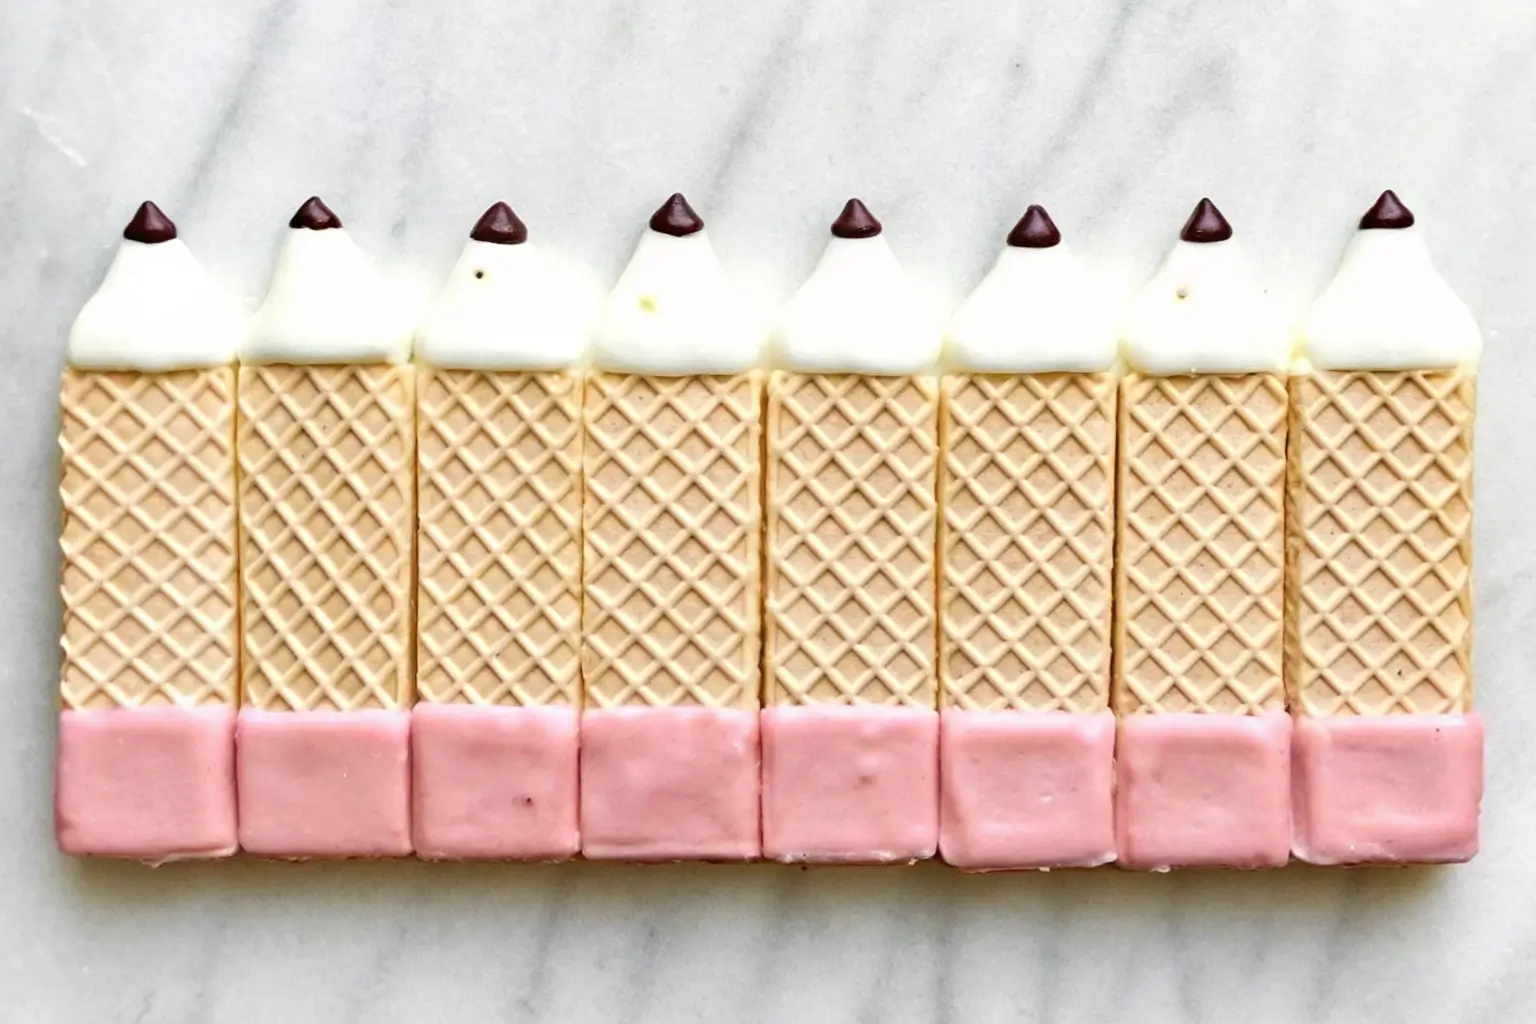
There’s something magical about the first day of school—the smell of freshly sharpened pencils, the sound of new notebooks opening, and the excitement of new beginnings. But what if those pencils were actually cookies? These adorable wafer pencil cookies are a fun, edible craft that’s as cute as it is delicious. With just four simple ingredients, you can transform plain wafers into realistic-looking pencils that kids will love. They’re the perfect surprise for a lunchbox, an after-school snack, or even a classroom party treat.
Table of Contents
Why You’ll Love This Recipe
- Quick & Easy – No baking required! Just melt, dip, and decorate.
- Kid-Friendly – Kids can help decorate, making it a fun after-school activity.
- Cute Factor – They really do look like pencils! Instagram- and Pinterest-worthy.
- Budget-Friendly – Only four ingredients needed, and each one is inexpensive.
- Versatile – Perfect for lunchboxes, party trays, or school events.
- Make Ahead – Store well in an airtight container, so you can prep in advance.
Ingredients
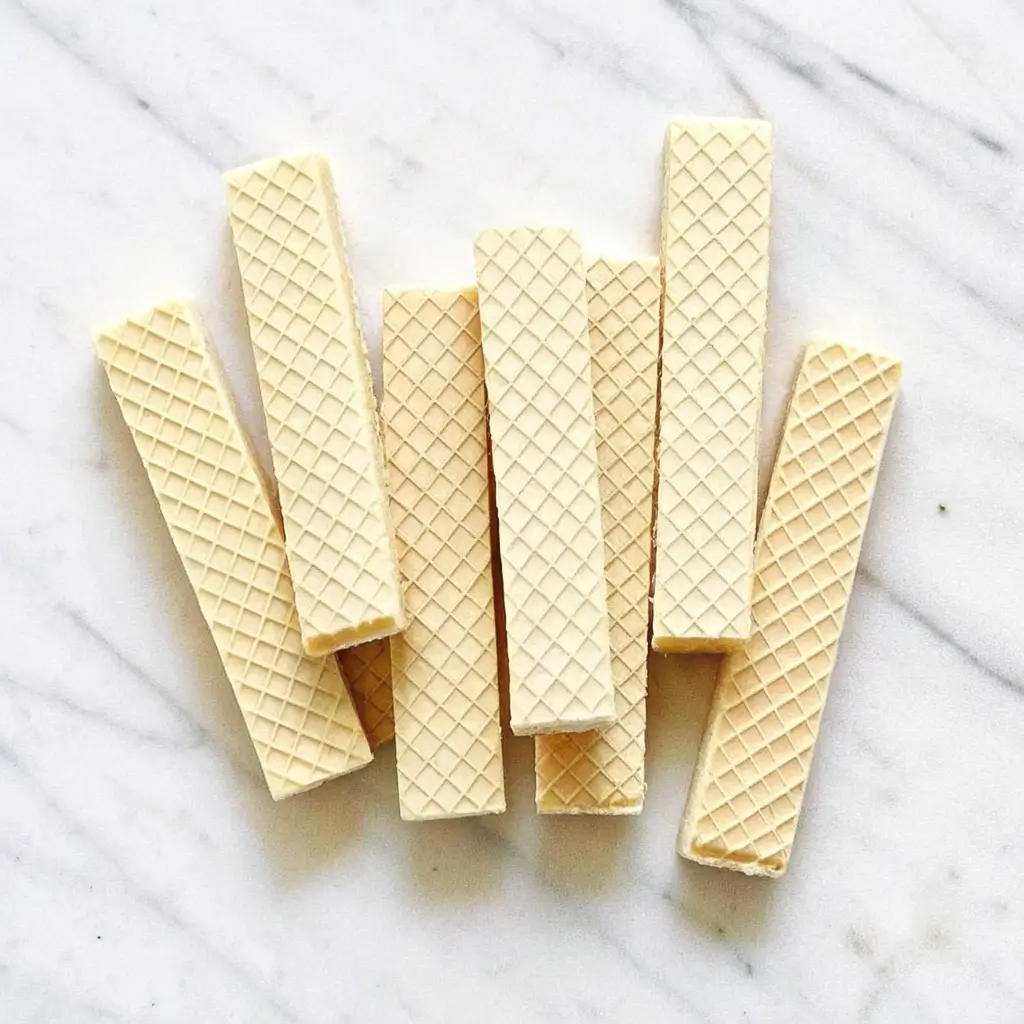
- Vanilla Wafer Cookies – The base of our edible pencils. Long, rectangular, and lightly sweet, they’re the perfect shape for crafting.
- White Chocolate Melting Wafers – Used to create the pencil tip. Smooth, creamy, and easy to melt, these give that “wooden” sharpened look.
- Pink Chocolate Melting Wafers – This gives each pencil its eraser end. The pop of color makes them instantly recognizable.
- Mini Chocolate Chips – The finishing touch! Placed at the tip, they become the pencil’s “lead.”
(Optional: Piping bags and a small round piping tip, like #3 or #5, make decorating easier, but you can also just use a spoon or knife.)
Step-by-Step Instructions
Step 1: Prep the Wafer Cookies
Take your vanilla wafers and use a sharp knife to trim one end into a point. Simply cut off the top corners at an angle so it resembles a sharpened pencil.

Step 2: Melt the Chocolates
Melt your pink and white chocolate wafers separately according to package directions. You can use the microwave in short bursts or a double boiler for smooth results.
Step 3: Create the Eraser
Dip or pipe a small rectangle of melted pink chocolate onto the flat end of the wafer. Smooth it out with a spoon or tap lightly to even it. This becomes the eraser.
Step 4: Make the Pencil Tip
Using melted white chocolate, fill in a small triangle at the pointed end of the wafer. This gives the illusion of the sharpened wood.
Step 5: Add the “Lead”
Before the white chocolate hardens, place a mini chocolate chip right at the tip. This is your pencil lead!
Step 6: Let Them Set
Lay the cookies on parchment paper and let them cool until the chocolate is firm. You can speed this up by popping them in the fridge for 5–10 minutes.
And just like that, you have edible pencil cookies!

Pro Tips for Success
- Cut All at Once – Trim all the wafers before melting chocolate to make decorating faster.
- Smooth Finish – Give cookies a gentle shake after piping chocolate to smooth out any bumps.
- Avoid Seizing Chocolate – Melt chocolate slowly to prevent clumping or burning.
- Assembly Line Method – Do all the pink ends first, then all the white tips, then add chocolate chips last.
- Storage – Keep in an airtight container for up to 5 days. Perfect for making ahead of a party.
Flavor Variations
- Frosting Instead of Chocolate – Use colored frosting tubes for quicker decorating.
- Different Eraser Colors – Try purple, blue, or even glittery edible dust for fun pencils.
- Personalized Pencils – Use writing gel or icing pens to write kids’ names on the cookies.
- Homemade Cookie Base – Swap wafers for sugar cookies cut into rectangles.
Serving Ideas
- Lunchbox Surprise – Slip one into your child’s lunchbox for a sweet back-to-school surprise.
- Classroom Party Platter – Arrange them on a tray like a bundle of pencils.
- Teacher Appreciation Gift – Wrap a few in a bag with a ribbon for a thoughtful (and edible!) gift.
- After-School Snack – Pair with a glass of milk for a treat that sparks conversation.
FAQs
Q: Can I make these ahead of time?
Yes! They keep well for up to 5 days in an airtight container.
Q: What if I don’t have piping bags?
No worries—you can use a spoon, knife, or even a zip-top bag with the corner snipped off.
Q: Can I freeze wafer pencil cookies?
Freezing isn’t recommended, as the wafers may soften once thawed.
Q: What if I can’t find pink melting chocolate?
Use white chocolate and add a drop of pink food coloring, or use ready-made pink frosting.
For More Recipe Inspiration
If you loved these edible pencil cookies, you’ll adore these other creative and fun recipes:
Quick Recap
These wafer pencil cookies are the ultimate back-to-school snack idea—adorable, tasty, and so easy to make. With just four ingredients and a few simple steps, you can create a treat that will earn an A+ with kids and parents alike.
Pin this recipe for later so you’ll have it ready for your next school celebration, or make a batch this weekend to surprise your little learners!

Adorable Wafer Pencil Cookies – Easy Back to School Snack Idea
Ingredients
Equipment
Method
- Trim one end of each wafer by cutting off the two top corners to form a point—this will be the sharpened pencil tip.
- Melt white and pink melting wafers in separate microwave-safe bowls in 20–30 second bursts, stirring between each until smooth (or use a double boiler).
- Pipe or spread a small rectangle of pink chocolate onto the flat end of each wafer to create the eraser. Tap gently to smooth.
- Pipe or fill a small triangle of white chocolate on the pointed end to mimic the sharpened wood.
- Before the white chocolate sets, place a mini chocolate chip at the very point for the pencil lead.
- Set decorated wafers on parchment paper and let stand until firm, 10–15 minutes (or chill 5–10 minutes to speed up).
